


OpenVAS on Kali GNU/Linux Part 2: First scan

In my previous blog post, I described how to install OpenVAS, in this blog post we will configure and execute a security scan with OpenVAS.
OpenVAS documentation is available on the OpenVAS developer website Greenbone: https://docs.greenbone.net/
Logon to the Greenbone Manager assistend at https://127.0.0.1:9392.
Security info
Security information is an important part of a security scanner. It describes how we can detect security issues on our network/systems.
Update
It always a good idea to update your security date regularly.
Execute the gvm-feed-update script, this will use
greenbone-feed-sync as the _gvm user to update the
GVMD_DATA, SCAP and CERT data.
$ sudo gvm-feed-update                                                    1 ⨯
[sudo] password for staf:
[>] Updating OpenVAS feeds
[*] Updating: NVT
Greenbone community feed server - http://feed.community.greenbone.net/
This service is hosted by Greenbone Networks - http://www.greenbone.net/
<snip>
receiving incremental file list
timestamp
             13 100%   12.70kB/s    0:00:00 (xfr#1, to-chk=0/1)

sent 43 bytes  received 115 bytes  105.33 bytes/sec
total size is 13  speedup is 0.08

staf㉿kali)-[~]
SecInfo
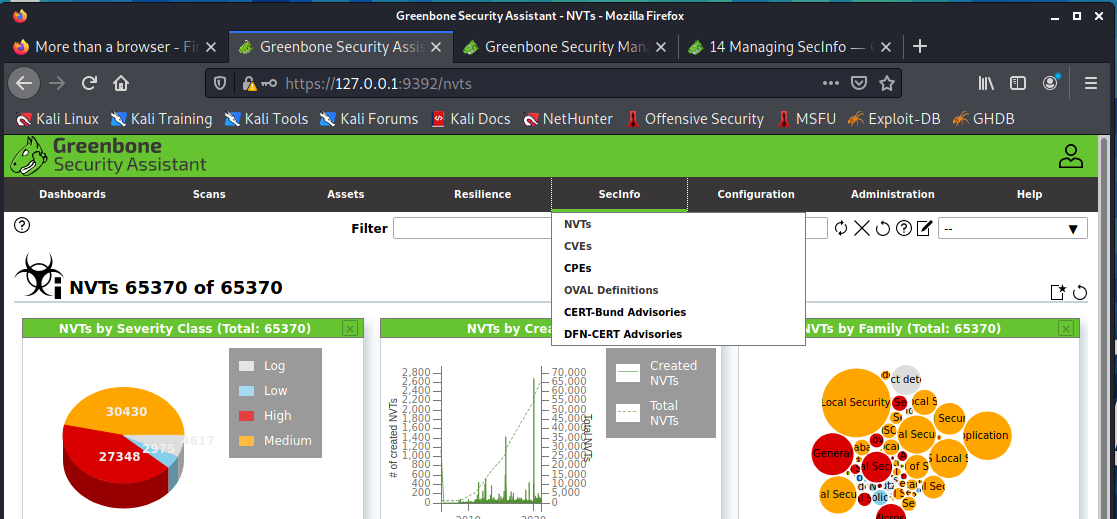
You can review the security data at the [SecInfo] tab in Greenbone Manager.
Documentation is available at the greenbone website: https://docs.greenbone.net/GSM-Manual/gos-20.08/en/managing-secinfo.html
OpenVAS use the following security information;
- NVT (Network Vulnerability Tests)
Test that that detects vulnerabilities on the targets. - CVE (Common Vulnerabilities and Exposures)
Most people know this term, it provides a standard way of publishing security vulnerability information. - CPE (Common Enumeration)
CPE is less know, it is a standard way of describing the device, system, software for security information. eg OpenSSH running on GNU/Linux. -
OVAL (Open Vulnerability Assessment Language)
This is a list that vendors publish with their software and the vulnerabilities. Security scanner like OpenVAS can use this data to detect outdated software.Other opensource security tools that can use this information are OpenSCAP, ovaldi.
This is standard developed by NIST as part of the SCAP (Security Automation Protocol)
FYI:
Most Linux distributions publish OVAL data.
One distribution that doesn’t publish OVAL is Centos. Redhat publishes OVAL data for RHEL but not for Centos. You can update the Redhat OVAL data for Centos (add the Centos CPE to the Redhat OVAL) But this is not certified officially. Also with the move to CentOS stream, this will not be possible anymore…
-
CERT-Bind Advisories
CERT-Bund Advisories are published by the CERT-Bund. - DFN-CERT Advisories
DFN-CERT advisories are published by the DFN-CERT.
Scan Configs

Under the tab [Configuration] [Scan Configs] you can configure the scan config that you can use to execute a scan on the target.
The default scan config can’t be updated. To clone a scan config you can press the “clone sheep” button. This allows you to update it, or to review the SCAP data that is used.
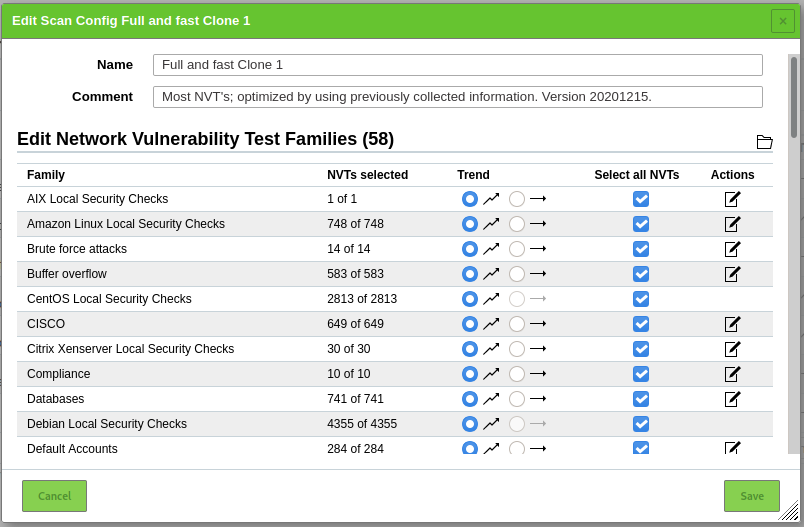
If you want to scan only GNU/Linux systems for example. You can create a custom profile with only the Linux distributions that you use, this will speed up the scan. Keep in mind that OpenVAS need to have access to the system to detect outdated software with the “Local Security Checks” with an authenticated scan.
Authentication can be configured on the [Configuration] [Credentials], we’ll not explain authentication scans in this blog post, but it should be self-explanatory.
As always be careful with creating backdoors on your network to manage or in this case review it for security. It’s important to protect the system that hosts the keys/passwords.
Target
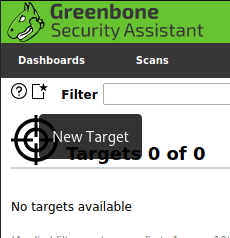
To create a new target goto the [Configuration] [Targets] and click on [New Target] icon. This will open the “New Target” window.
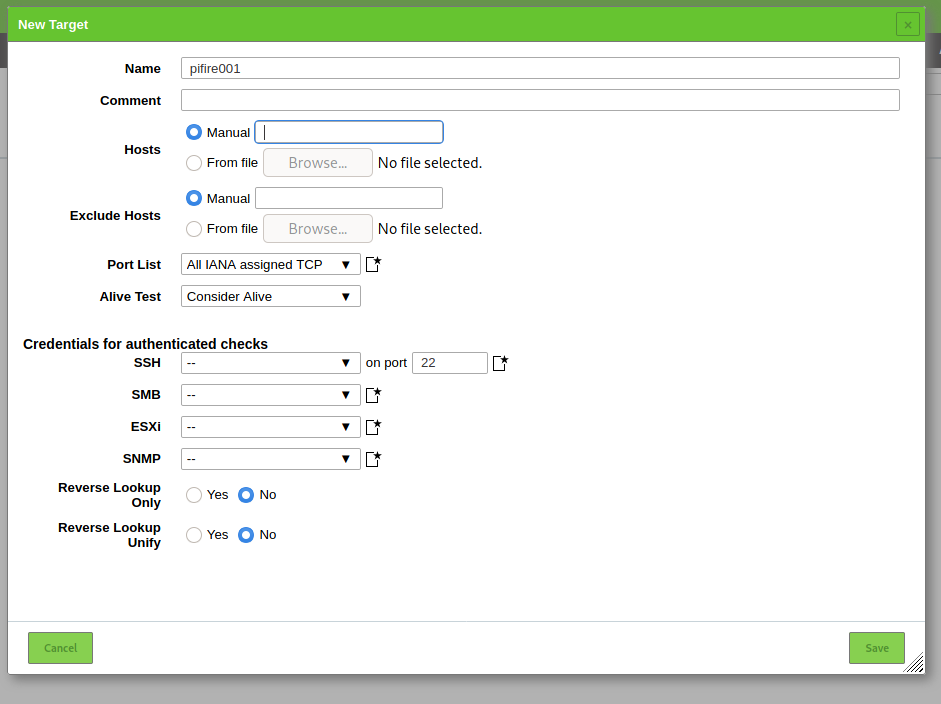
You can configure your target in this window, fill in the IP address etc. If you know that your Target has a firewall running, you can set “Alive Test” to “Consider Alive”.
When you have configured Credentials for your target you can use configure them at the “Credentials for authenticated checks” section.
Press [Save] to save the Target.
Scan
Configure the scan
To configure the scan goto the [Scans] tab and select [Tasks].
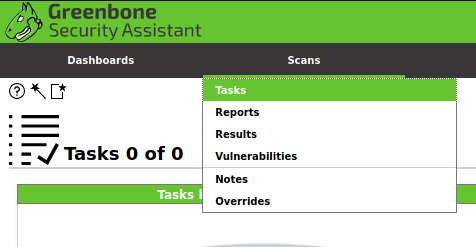
Click on the [New Task] icon this will give two options “New Task” and “New Container Task”.
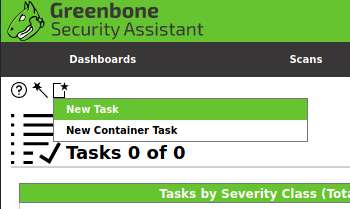
A “Container Scan” is used to import reports of other Greenbone Security Managers. A “normal scan” will execute the scan on the Target.
We’ll set up regular scan, so select “New Task”.
This will open the “New Task” Windows
Openvas has two types of Builtin Scanners:
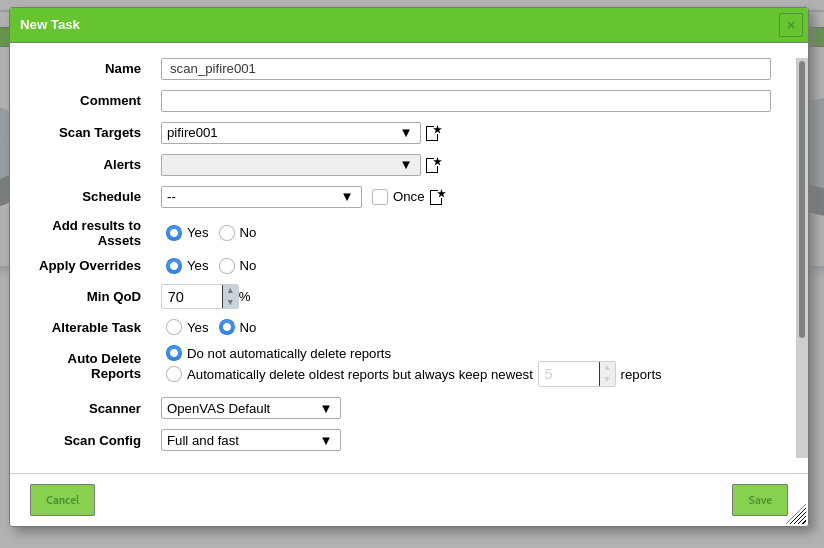
-
OpenVAS Default Scanner
This will execute a security scan on the Target. -
CVE Scanner
This scanner is used to make a forecast of the possible security risks base on information of the Target that was gathered by previous scans (Like the OpenVAS Scanner). It takes the CPE (information of installed software etc) and makes a forecast of possible security risks with the CVE information found at [SecInfo].
With Alterable Task we can specify if the task can be updated, if we allow the task to be alterable the reports of the scan are more difficult to compare to the previous scans.
At Scan Config we select the desired Scan Configuration select [Full and fast].
Click on the [Start Scan] icon to start the scan.

Depending on the scan configuration and the number of hosts in your scan task configuration this will take some time.
Results
To view the report of scan you can click on the Reports column next to the scan. At the [Scans] tab you can select Reports, Results, Vulnerabilities.
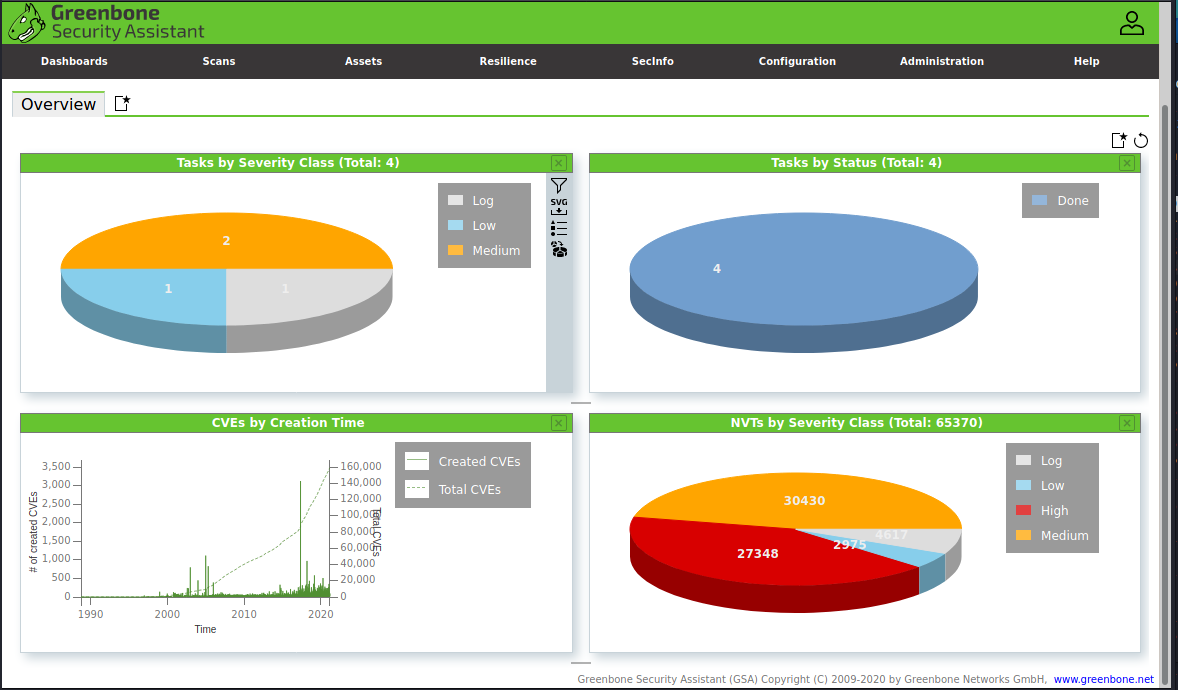
At the Dashboards tab you get a nice overview of the Scan and the results. It’s also possible to create custom dashboards.
Have fun!
Leave a comment