Getting started with GitLab-CE. Part 1: Installation
CI/CD Platform Overview
When you want or need to use CI/CD you have a lot of CI/CD platforms where you can choose from. As with most “tools”, the tool is less important. What (which flow, best practices, security benchmarks, etc) and how you implement it, is what matters.
One of the most commonly used options is Jenkins.
I used and still use Jenkins and created a jenkins build workstation to build software and test in my homelab a couple of years back.
Jenkins started as Hudson at Sun Microsystem(RIP). Hudson is one of the many open-source projects that were started at Sun and killed by Oracle. Jenkins continued as the open-source fork of Hudson.
Jenkins has evolved. If you need to do more complex things you probably end up creating a lot of groovy scripts, nothing wrong with groovy. But as with a lot of discussions about programming, the ecosystem (who is using it, which libraries are available, etc) is important.
Groovy isn’t that commonly used in and known in the system administration ecosystem so this is probably something you need to learn if you’re coming for the system administrator world ( as I do, so I learnt the basics of Groovy this way ).
The other option is to implement CI/CD using the commonly used source hosting platforms; GitHub and GitLab.
- On GitHub we have GitHub Actions.
- On GitLab there is GitLab CI/CD.
Both have offerings that you can use on-premise;
- GitHub has GitHub Enterpise Server.
- GitLab Gitlab Community Edition and Gitlab Enterprise Edition are available.
There are other CI/CD systems available. Other examples are Tekon - used by RedHat on OpenShift - and Drone which have gained popularity. Just to name a few.
I started to use GitLab in my lab to build/test/and deploy software. Why GitLab? with Gitlab you have the option to use the same pipelines as on the Gitlab source hosting platform on your on-premise installation.
Gitlab comes in two versions;
- Gitlab Community Edition. This is the open-source version with the basic functionality.
- Gitlab Enterpise Edition. This is the “source-available” paid version.
You can find more information about the difference between the two versions at: https://about.gitlab.com/handbook/marketing/brand-and-product-marketing/product-and-solution-marketing/tiers/.
In general, I don’t like this approach, having a paid non-open source version doesn’t help that end-users (developers) and different companies work together to improve the software. Companies that use the software will pay for support and consultancy services in the long run.
But it is what it is. If you want to use GitLab CI/CD on GitLab in your homelab environment GitLab-CE is the option to go.
In this blog series, we will go over the installation of GitLab CE and its basic features, as always my blog posts are my installation instructions/notes that I took during my setup in the hope that it is useful to somebody else.
Installation
All actions are executed on Debian GNU/Linux 12 (bookworm) on X86 and ARM64 as I migrated all my systems that are running constantly on a cluster running on Raspberry Pi’s 4 to save power.
I mainly follow the official installation instructions at https://about.gitlab.com/install/#debian and the blog post at: https://www.linuxtechi.com/how-to-install-gitlab-on-ubuntu/.
Install requirements
Update
As always it’s a good idea to update your software (regularly).
Update the package database.
staf@tstgitlab:~$ sudo apt update -y
[sudo] password for staf:
Get:1 http://security.debian.org/debian-security bookworm-security InRelease [48.0 kB]
Get:2 http://deb.debian.org/debian bookworm InRelease [151 kB]
Get:3 http://deb.debian.org/debian bookworm-updates InRelease [52.1 kB]
Get:4 http://deb.debian.org/debian bookworm-backports InRelease [56.5 kB]
Get:5 http://security.debian.org/debian-security bookworm-security/main Sources [57.5 kB]
Get:7 http://security.debian.org/debian-security bookworm-security/main amd64 Packages [95.7 kB]
Get:8 http://security.debian.org/debian-security bookworm-security/main Translation-en [54.4 kB]
Get:9 http://deb.debian.org/debian bookworm-backports/main Sources.diff/Index [63.3 kB]
Get:10 http://deb.debian.org/debian bookworm-backports/main amd64 Packages.diff/Index [63.3 kB]
Hit:6 https://packages.gitlab.com/gitlab/gitlab-ce/debian bookworm InRelease
Get:11 http://deb.debian.org/debian bookworm-backports/main Sources T-2023-11-03-1405.27-F-2023-11-03-1405.27.pdiff [836 B]
Get:11 http://deb.debian.org/debian bookworm-backports/main Sources T-2023-11-03-1405.27-F-2023-11-03-1405.27.pdiff [836 B]
Get:12 http://deb.debian.org/debian bookworm-backports/main amd64 Packages T-2023-11-03-2011.07-F-2023-11-03-2011.07.pdiff [1,216 B]
Get:12 http://deb.debian.org/debian bookworm-backports/main amd64 Packages T-2023-11-03-2011.07-F-2023-11-03-2011.07.pdiff [1,216 B]
Fetched 644 kB in 1s (793 kB/s)
Reading package lists... Done
Building dependency tree... Done
Reading state information... Done
All packages are up to date.
staf@tstgitlab:~$
Upgrade the packages.
staf@tstgitlab:~$ sudo apt upgrade -y
Reading package lists... Done
Building dependency tree... Done
Reading state information... Done
Calculating upgrade... Done
0 upgraded, 0 newly installed, 0 to remove and 0 not upgraded.
staf@tstgitlab:~$
Install the required packages
Install the required dependencies.
staf@tstgitlab:~$ sudo apt-get install -y curl openssh-server ca-certificates perl
Reading package lists... Done
Building dependency tree... Done
Reading state information... Done
curl is already the newest version (7.88.1-10+deb12u4).
curl set to manually installed.
openssh-server is already the newest version (1:9.2p1-2+deb12u1).
ca-certificates is already the newest version (20230311).
ca-certificates set to manually installed.
perl is already the newest version (5.36.0-7).
perl set to manually installed.
0 upgraded, 0 newly installed, 0 to remove and 0 not upgraded.
staf@tstgitlab:~$
If you want your system to send out emails for GitLab, you’ll need to set up a local mail server like Postfix or you can reconfigure GitLab to use another email server. See below for references on how to configure this on GitLab.
Setup the GitLab CE Repositories
GitLab provides a script to set up the GitLab repositories for both GitLab CE and GitLab EE. We’ll use GitLab CE. As always it’s a good idea to not run a script that you pulled for the internet blindly; we’ll download the script, review it and execute it.
Create a directory.
staf@tstgitlab:~$ mkdir gitlab
staf@tstgitlab:~$
Download the repository setup script.
staf@tstgitlab:~/gitlab$ wget https://packages.gitlab.com/install/repositories/gitlab/gitlab-ce/script.deb.sh
--2023-11-03 08:11:58--  https://packages.gitlab.com/install/repositories/gitlab/gitlab-ce/script.deb.sh
Resolving packages.gitlab.com (packages.gitlab.com)... 172.64.148.245, 104.18.39.11, 2606:4700:4400::6812:270b, ...
Connecting to packages.gitlab.com (packages.gitlab.com)|172.64.148.245|:443... connected.
HTTP request sent, awaiting response... 200 OK
Length: 6865 (6.7K) [text/install_instructions]
Saving to: ‘script.deb.sh’

script.deb.sh       100%[===================>]   6.70K  --.-KB/s    in 0s

2023-11-03 08:11:58 (35.9 MB/s) - ‘script.deb.sh’ saved [6865/6865]

staf@tstgitlab:~/gitlab$
Review the script.
staf@tstgitlab:~/gitlab$ vi script.deb.sh
Execute it.
staf@tstgitlab:~/gitlab$ sudo bash script.deb.sh
Detected operating system as debian/12.
Checking for curl...
Detected curl...
Checking for gpg...
Detected gpg...
Running apt-get update... done.
Installing debian-archive-keyring which is needed for installing
apt-transport-https on many Debian systems.
Installing apt-transport-https... done.
Installing /etc/apt/sources.list.d/gitlab_gitlab-ce.list...done.
Importing packagecloud gpg key... done.
Running apt-get update... done.

The repository is setup! You can now install packages.
staf@tstgitlab:~/gitlab$
Installation
The installation is straightforward, you need to specify the EXTERNAL_URL environment variable and install the gitlab-ce package.
staf@tstgitlab:~/gitlab$ sudo EXTERNAL_URL="http://tstgitlab" apt install gitlab-ce
<snip>
Notes:
Default admin account has been configured with following details:
Username: root
Password: You didn't opt-in to print initial root password to STDOUT.
Password stored to /etc/gitlab/initial_root_password. This file will be cleaned up in first reconfigure run after 24 hours.

NOTE: Because these credentials might be present in your log files in plain text, it is highly recommended to reset the password following https://docs.gitlab.com/ee/security/reset_use
r_password.html#reset-your-root-password.

gitlab Reconfigured!

       *.                  *.
      ***                 ***
     *****               *****
    .******             *******
    ********            ********
   ,,,,,,,,,***********,,,,,,,,,
  ,,,,,,,,,,,*********,,,,,,,,,,,
  .,,,,,,,,,,,*******,,,,,,,,,,,,
      ,,,,,,,,,*****,,,,,,,,,.
         ,,,,,,,****,,,,,,
            .,,,***,,,,
                ,*,.


     _______ __  __          __
    / ____(_) /_/ /   ____ _/ /_
   / / __/ / __/ /   / __ `/ __ \
  / /_/ / / /_/ /___/ /_/ / /_/ /
  \____/_/\__/_____/\__,_/_.___/


Thank you for installing GitLab!
GitLab should be available at http://tstgitlab

For a comprehensive list of configuration options please see the Omnibus GitLab readme
https://gitlab.com/gitlab-org/omnibus-gitlab/blob/master/README.md

Help us improve the installation experience, let us know how we did with a 1 minute survey:
https://gitlab.fra1.qualtrics.com/jfe/form/SV_6kVqZANThUQ1bZb?installation=omnibus&release=16-5

staf@tstgitlab:~/gitlab$
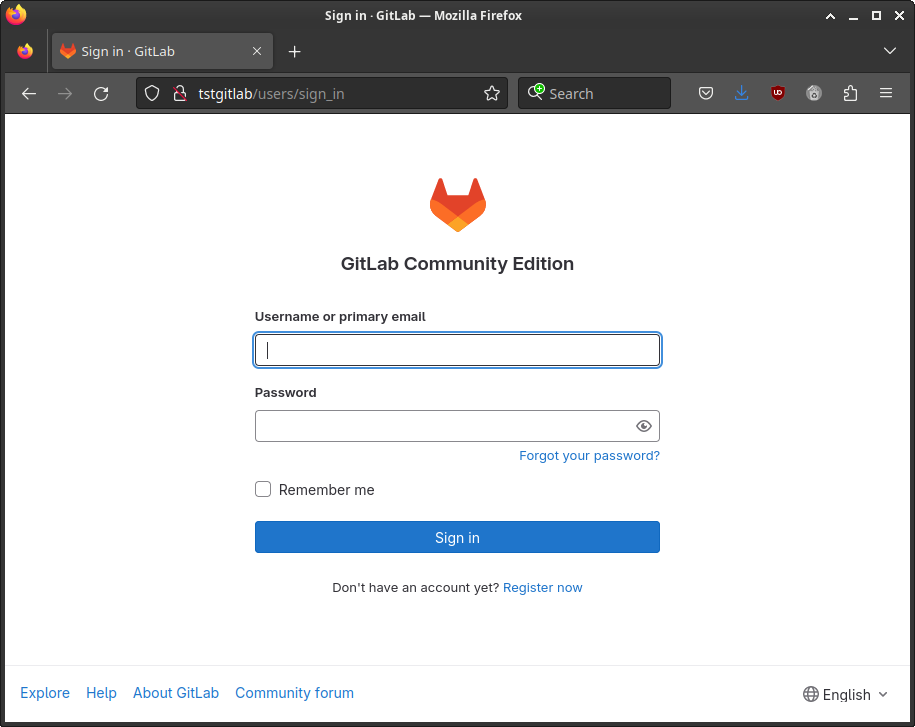
Open your browser to the GitLab URL if everything goes well you see the GitLab login screen.

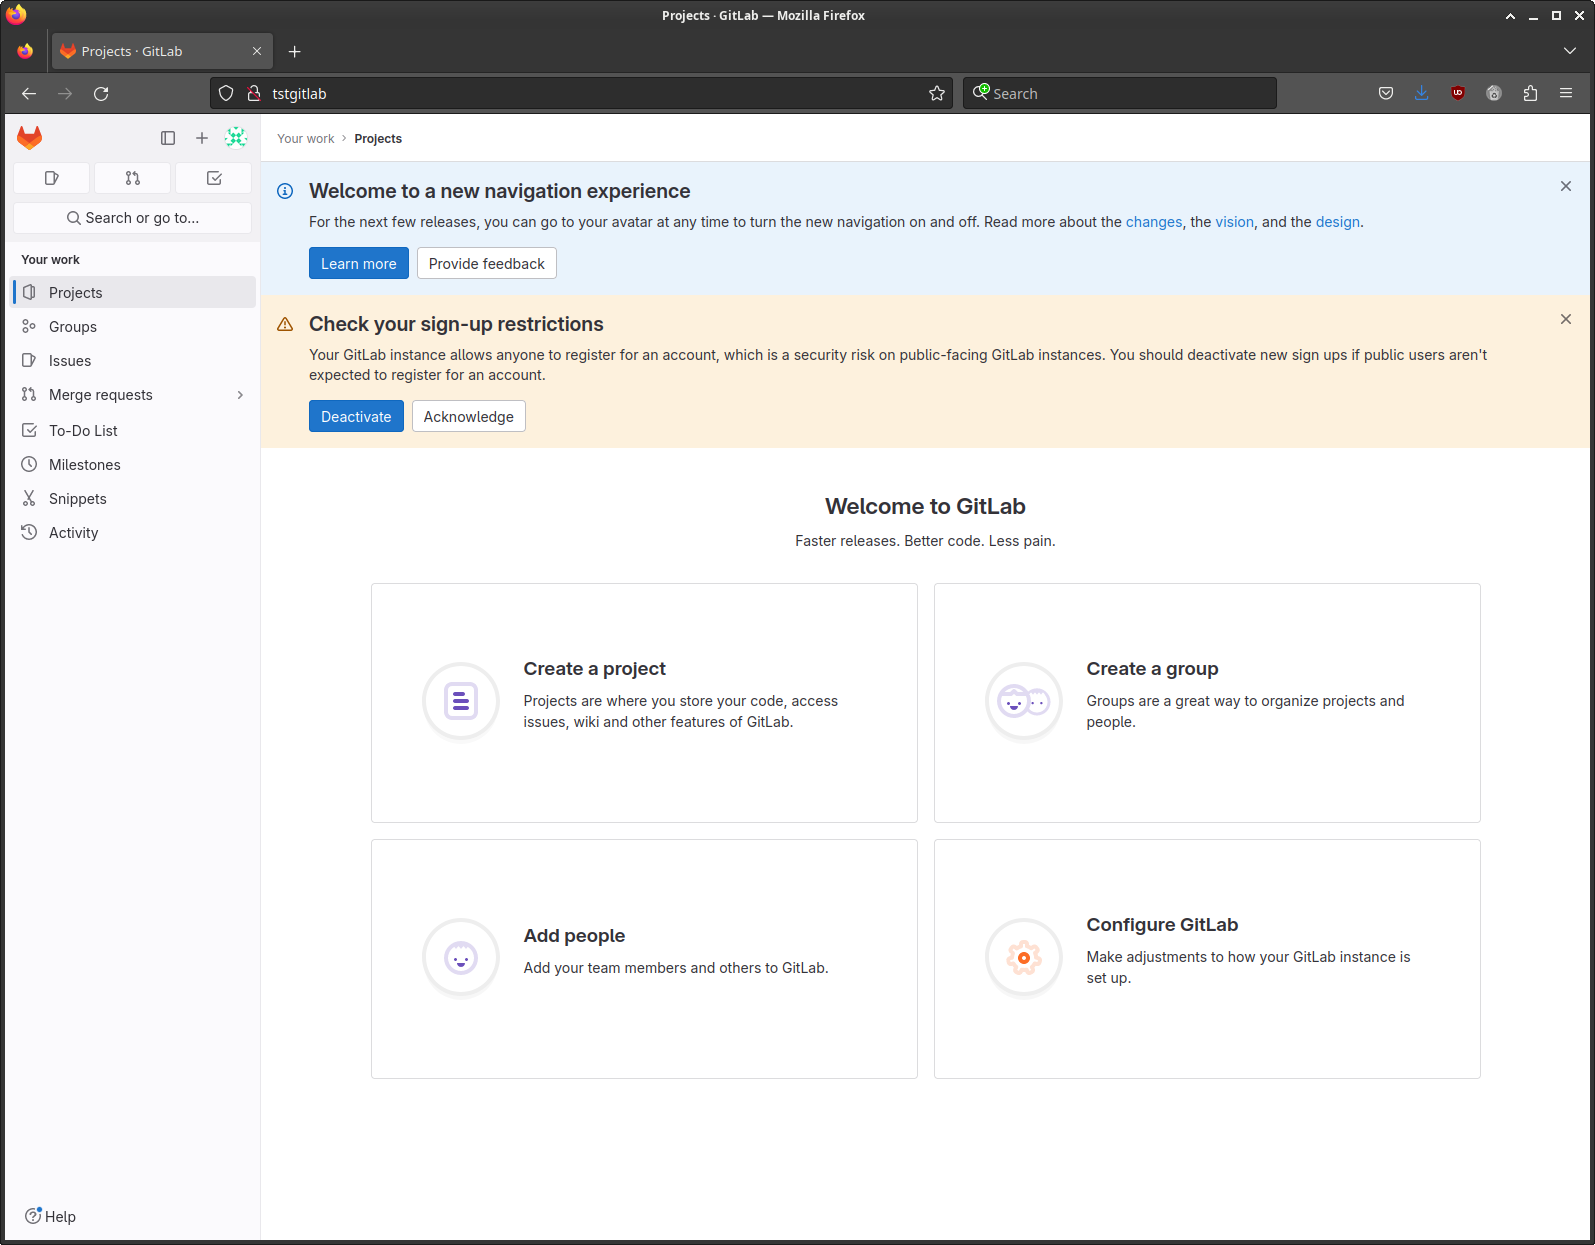
You can log in as the root user and the initial password that was created during the installation.
This password is stored in the /etc/gitlab/initial_root_password file.
Please note that the password file will be deleted by GitLab automatically, so copy it and keep it in a safe place.
Display the password.
staf@tstgitlab:~$ ls -l /etc/gitlab/initial_root_password
-rw------- 1 root root 749 Nov  3 08:18 /etc/gitlab/initial_root_password
staf@tstgitlab:~$
staf@tstgitlab:~$ sudo cat /etc/gitlab/initial_root_password
[sudo] password for staf:
# WARNING: This value is valid only in the following conditions
#          1. If provided manually (either via `GITLAB_ROOT_PASSWORD` environment variable or via `gitlab_rails['initial_root_password']` setting in `gitlab.rb`, it was provided before database was seeded for the first time (usually, the first reconfigure run).
#          2. Password hasn't been changed manually, either via UI or via command line.
#
#          If the password shown here doesn't work, you must reset the admin password following https://docs.gitlab.com/ee/security/reset_user_password.html#reset-your-root-password.

Password: <snip>

# NOTE: This file will be automatically deleted in the first reconfigure run after 24 hours.
staf@tstgitlab:~$
And login:

Post configuration
HTTPS
GitLab uses NGINX under the hood, enabling https on our installation is reconfiguring NGINX. GitLab also comes with Let’s Encrypt support; see https://docs.gitlab.com/omnibus/settings/ssl/ for more information. When you specify https:// as part of the EXTERNAL_URL environment variable during the installation the GitLab installer will set up Let’s Encrypt automatically. But I didn’t try this, in this blog post we’ll set up a self-signed certificate.
Security (rant)
In a corporate environment, you might want to use an internal certificate authority. But if you want/need to set up an internal CA authority it needs to be secured.
You need to protect your private keys and limit access to the authority, if you don’t have the resources or the time available to set up CA authority in a decent way, it’s better not you use an internal CA authority as this is an attack vector - if an attacker has gained access to the CA authority - or has copied the private key - he/she can generate certificates for every host/domain.
Bottom line; if you don’t have the time to set up CA authority in a secure way it’s better to use Let’s Encrypt or another third-party Authority. Or even just use a self-signing certificate.
I use a HSM - SmartCard-HSM and my CA Authority is offline see https://stafwag.github.io/blog/blog/2020/04/29/setup-an-ca-with-smartcard/
Create a self-signed certificate
I mainly followed the official documentation at GitLab: https://docs.gitlab.com/omnibus/settings/ssl/index.html#configure-https-manually
Set the external_url & disable let’s encrypt
Open your favourite editor.
root@gitlab:~# nvi /etc/gitlab/gitlab.rb
root@gitlab:~#
Update the external_url to use https://.
## GitLab URL
##! URL on which GitLab will be reachable.
##! For more details on configuring external_url see:
##! https://docs.gitlab.com/omnibus/settings/configuration.html#configuring-the-external-url-for-gitlab
##!
##! Note: During installation/upgrades, the value of the environment variable
##! EXTERNAL_URL will be used to populate/replace this value.
##! On AWS EC2 instances, we also attempt to fetch the public hostname/IP
##! address from AWS. For more details, see:
##! https://docs.aws.amazon.com/AWSEC2/latest/UserGuide/instancedata-data-retrieval.html
external_url 'https://gitlab.stafnet.local'
Set letsencrypt['enable'] = false to disable let’s encrypt support.
################################################################################
# Let's Encrypt integration
################################################################################
letsencrypt['enable'] = false
Create a self-signed certificate
What is a self-signed certificate?
A certificate is a way to distribute a public key. A certificate is normally signed by a CA authority private key. You trust the CA authority public key distributed in the CA certificate.
A “self-signed certificate” is just a certificate that is signed with the corresponding private key of the certificate instead of the private key of the CA authority.
Create the SSL directory
Create the /etc/gitlab/ssl directory.
root@gitlab:/etc/gitlab# ls
config_backup  gitlab.rb  gitlab-secrets.json  trusted-certs
root@gitlab:/etc/gitlab# mkdir ssl
root@gitlab:/etc/gitlab#
And set the permissions.
root@gitlab:/etc/gitlab# chmod 755 ssl
root@gitlab:/etc/gitlab#
Private key
We’ll create a private key for our self-signed certificate, please note that we don’t encrypt the private key as this would as we would need to type in the password for the private key password each time we start GitLab.
Create a private key.
root@gitlab:/etc/gitlab/ssl# openssl genrsa -out gitlab.stafnet.local.key 4096
root@gitlab:/etc/gitlab/ssl#
CSR
Create a certificate request.
root@gitlab:/etc/gitlab/ssl# openssl req -key gitlab.stafnet.local.key -new -out gitlab.stafnet.local.csr
You are about to be asked to enter information that will be incorporated
into your certificate request.
What you are about to enter is what is called a Distinguished Name or a DN.
There are quite a few fields but you can leave some blank
For some fields there will be a default value,
If you enter '.', the field will be left blank.
-----
Country Name (2 letter code) [AU]:BE
State or Province Name (full name) [Some-State]:Antwerp
Locality Name (eg, city) []:Antwerp
Organization Name (eg, company) [Internet Widgits Pty Ltd]:stafnet
Organizational Unit Name (eg, section) []:
Common Name (e.g. server FQDN or YOUR name) []:gitlab.stafnet.local
Email Address []:

Please enter the following 'extra' attributes
to be sent with your certificate request
A challenge password []:
An optional company name []:
root@gitlab:/etc/gitlab/ssl#
Sign
Sign your certificate with your private key.
root@gitlab:/etc/gitlab/ssl# openssl x509 -signkey gitlab.stafnet.local.key -in gitlab.stafnet.local.csr -req -days 365 -out gitlab.stafnet.local.crt
Certificate request self-signature ok
subject=C = BE, ST = Antwerp, L = Antwerp, O = stafnet, CN = gitlab.stafnet.local
root@gitlab:/etc/gitlab/ssl#
Verify permissions
Make sure that your private key is not world-readable.
root@gitlab:/etc/gitlab/ssl# ls -l
total 12
-rw-r--r-- 1 root root 1895 Nov 12 10:22 gitlab.stafnet.local.crt
-rw-r--r-- 1 root root 1691 Nov 12 10:20 gitlab.stafnet.local.csr
-rw------- 1 root root 3272 Nov  8 20:25 gitlab.stafnet.local.key
root@gitlab:/etc/gitlab/ssl#
Reconfigure GitLab
Open gitlab.rb in your favourite editor.
root@gitlab:/etc/gitlab/ssl# vi /etc/gitlab/gitlab.rb
root@gitlab:/etc/gitlab/ssl#
Update the external_url setting.
##! EXTERNAL_URL will be used to populate/replace this value.
##! On AWS EC2 instances, we also attempt to fetch the public hostname/IP
##! address from AWS. For more details, see:
##! https://docs.aws.amazon.com/AWSEC2/latest/UserGuide/instancedata-data-retrieval.html
external_url 'https://gitlab.stafnet.local'
Add the following settings to the bottom of the file.
nginx['redirect_http_to_https'] = true
registry_nginx['redirect_http_to_https'] = true
mattermost_nginx['redirect_http_to_https'] = true
Run gitlab-ctl reconfigure to reconfigure gitlab.
root@gitlab:/etc/gitlab/ssl# gitlab-ctl reconfigure
oot@gitlab:/etc/gitlab/ssl# gitlab-ctl reconfigure
[2023-11-12T11:05:43+01:00] INFO: Started Cinc Zero at chefzero://localhost:1 with repository at /opt/gitlab/embedded (One version per cookbook)
Cinc Client, version 17.10.0
Patents: https://www.chef.io/patents
Infra Phase starting
[2023-11-12T11:05:43+01:00] INFO: *** Cinc Client 17.10.0 ***
[2023-11-12T11:05:43+01:00] INFO: Platform: aarch64-linux
[2023-11-12T11:05:43+01:00] INFO: Cinc-client pid: 52849
[2023-11-12T11:05:46+01:00] INFO: Setting the run_list to ["recipe[gitlab]"] from CLI options
[2023-11-12T11:05:46+01:00] INFO: Run List is [recipe[gitlab]]
[2023-11-12T11:05:46+01:00] INFO: Run List expands to [gitlab]
<snip>
  * template[/var/opt/gitlab/postgres-exporter/queries.yaml] action create (up to date)
  * consul_service[postgres-exporter] action delete
    * file[/var/opt/gitlab/consul/config.d/postgres-exporter-service.json] action delete (up to date)
     (up to date)
Recipe: gitlab::database_reindexing_disable
  * crond_job[database-reindexing] action delete
    * file[/var/opt/gitlab/crond/database-reindexing] action delete (up to date)
     (up to date)
[2023-11-12T11:06:20+01:00] INFO: Cinc Client Run complete in 34.625114871 seconds

Running handlers:
[2023-11-12T11:06:20+01:00] INFO: Running report handlers
Running handlers complete
[2023-11-12T11:06:20+01:00] INFO: Report handlers complete
Infra Phase complete, 0/805 resources updated in 37 seconds
gitlab Reconfigured!
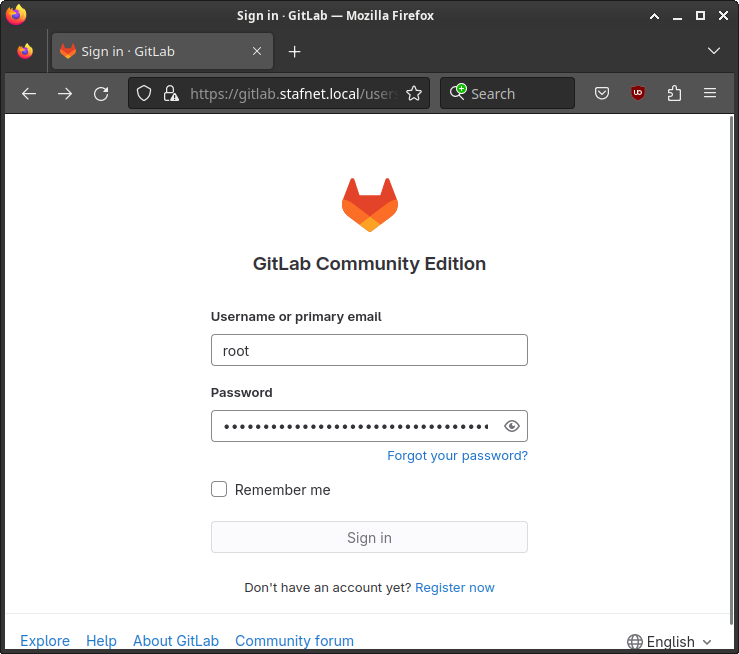
If everything goes well you’re able to login to your gitlab instance over https://.

By default, GitLab will use localhost as the email server. You either need to reconfigure the local email server to be able to send out emails. Or you can reconfigure GitLab to use an external SMTP server.
You can find more information on how to use an external email server in GitLab at: https://docs.gitlab.com/omnibus/settings/smtp.
Backup
The GitLab backup/restore procedure is explained at: https://docs.gitlab.com/ee/administration/backup_restore/
To execute a backup run the gitlab-backup create command.
The backups are restored in the /var/opt/gitlab/backups directory.
root@gitlab:/etc/gitlab/ssl# ls -l /var/opt/gitlab/backups
total 3684
-rw------- 1 git git  491520 Oct  7 11:53 1696672275_2023_10_07_16.4.0_gitlab_backup.tar
-rw------- 1 git git  512000 Nov  3 11:36 1699007796_2023_11_03_16.4.1_gitlab_backup.tar
-rw------- 1 git git 1382400 Nov 12 11:49 1699786111_2023_11_12_16.5.1_gitlab_backup.tar
-rw------- 1 git git 1382400 Nov 12 11:53 1699786384_2023_11_12_16.5.1_gitlab_backup.tar
root@gitlab:/etc/gitlab/ssl#
Have fun!
Links
- https://about.gitlab.com/install/#debian
- https://docs.gitlab.com/omnibus/settings/nginx.html#manually-configuring-https
- https://docs.gitlab.com/omnibus/settings/ssl/index.html#configure-https-manually
- https://www.baeldung.com/openssl-self-signed-cert
- https://www.linuxtechi.com/how-to-install-gitlab-on-ubuntu/
- https://docs.gitlab.com/omnibus/settings/smtp
- https://docs.gitlab.com/omnibus/settings/smtp
- https://docs.gitlab.com/ee/administration/backup_restore/


Leave a comment