Use a GPG smartcard with Thunderbird. Part 3: Setup Thunderbird
In previous blog posts, we discussed setting up a GPG smartcard on GNU/Linux and FreeBSD.
In this blog post, we will configure Thunderbird to work with an external smartcard reader and our GPG-compatible smartcard.
Before Thunderbird 78, if you wanted to use OpenPGP email encryption, you had to use a third-party add-on such as https://enigmail.net/.
Thunderbird’s recent versions natively support OpenPGP. The Enigmail addon for Thunderbird has been discontinued. See: https://enigmail.net/index.php/en/home/news.
I didn’t find good documentation on how to set up Thunderbird with a GnuPG smartcard when I moved to a new coreboot laptop, so this was the reason I created this blog post series.
GnuPG configuration
We’ll not go into too much detail on how to set up GnuPG. This was already explained in the previous blog posts.
- Use a GPG smartcard with Thunderbird. Part 1: setup GnuPG
- Use a GPG smart card with Thunderbird. Part 2: setup GnuPG on FreeBSD
If you want to use a HSM with GnuPG you can use the gnupg-pkcs11-scd agent https://github.com/alonbl/gnupg-pkcs11-scd that translates the pkcs11 interface to GnuPG. A previous blog post describes how this can be configured with SmartCard-HSM.
We’ll go over some steps to make sure that the GnuPG is set up correctly before we continue with the Thunderbird configuration. The pinentry command must be
configured with graphical support to type our pin code in the Graphical user environment.
Import Public Key
Make sure that your public key - or the public key of the reciever(s) - is/are imported.
[staf@snuffel ~]$ gpg --list-keys
[staf@snuffel ~]$
[staf@snuffel ~]$ gpg --import <snip>.asc
gpg: key XXXXXXXXXXXXXXXX: public key "XXXX XXXXXXXXXX <XXX@XXXXXX>" imported
gpg: Total number processed: 1
gpg:               imported: 1
[staf@snuffel ~]$
[staf@snuffel ~]$  gpg --list-keys
/home/staf/.gnupg/pubring.kbx
-----------------------------
pub   xxxxxxx YYYYY-MM-DD [SC]
      XXXXXXXXXXXXXXXXXXXXXXXXXXXXXXXXXXXXXXXX
uid           [ xxxxxxx] xxxx xxxxxxxxxx <xxxx@xxxxxxxxxx.xx>
sub   xxxxxxx xxxx-xx-xx [A]
sub   xxxxxxx xxxx-xx-xx [E]

[staf@snuffel ~]$
Pinentry
Thunderbird will not ask for your smartcard’s pin code.
This must be done on your smartcard reader if it has a pin pad or an external pinentry program.
The pinentry is configured in the gpg-agent.conf configuration file. As we’re using Thunderbird is a graphical environment we’ll configure it to use a graphical version.
Installation
I’m testing KDE plasma 6 on FreeBSD, so I installed the Qt version of pinentry.
On GNU/Linux you can check the documentation of your favourite Linux distribution to install a graphical pinentry. If you use a Graphical user environment there is probably already a graphical-enabled pinentry installed.
[staf@snuffel ~]$ sudo pkg install -y pinentry-qt6
Updating FreeBSD repository catalogue...
FreeBSD repository is up to date.
All repositories are up to date.
The following 1 package(s) will be affected (of 0 checked):

New packages to be INSTALLED:
        pinentry-qt6: 1.3.0

Number of packages to be installed: 1

76 KiB to be downloaded.
[1/1] Fetching pinentry-qt6-1.3.0.pkg: 100%   76 KiB  78.0kB/s    00:01
Checking integrity... done (0 conflicting)
[1/1] Installing pinentry-qt6-1.3.0...
[1/1] Extracting pinentry-qt6-1.3.0: 100%
==> Running trigger: desktop-file-utils.ucl
Building cache database of MIME types
[staf@snuffel ~]$
Configuration
The gpg-agent is responsible for starting the pinentry program. Let’s reconfigure it to start the pinentry that we like to use.
[staf@snuffel ~]$ cd .gnupg/
[staf@snuffel ~/.gnupg]$
[staf@snuffel ~/.gnupg]$ vi gpg-agent.conf
The pinentry is configured in the pinentry-program directive. You’ll find the complete gpg-agent.conf that I’m using below.
debug-level expert
verbose
verbose
log-file /home/staf/logs/gpg-agent.log
pinentry-program /usr/local/bin/pinentry-qt
Reload the sdaemon and gpg-agent configuration.
staf@freebsd-gpg3:~/.gnupg $ gpgconf --reload scdaemon
staf@freebsd-gpg3:~/.gnupg $ gpgconf --reload gpg-agent
staf@freebsd-gpg3:~/.gnupg $
Test
To verify that gpg works correctly and that the pinentry program works in our graphical environment we sign a file.
Create a new file.
$ cd /tmp
[staf@snuffel /tmp]$
[staf@snuffel /tmp]$ echo "foobar" > foobar
[staf@snuffel /tmp]$
Try to sign it.
[staf@snuffel /tmp]$ gpg --sign foobar
[staf@snuffel /tmp]$
If everything works fine, the pinentry program will ask for the pincode to sign it.
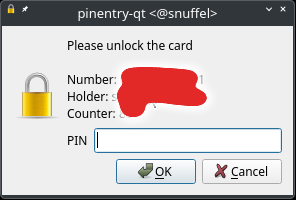
Thunderbird
In this section we’ll (finally) configure Thunderbird to use GPG with a smartcard reader.
Allow external smartcard reader
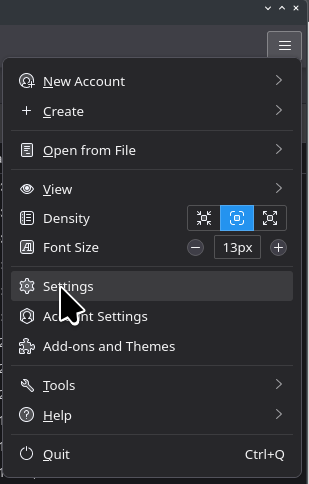
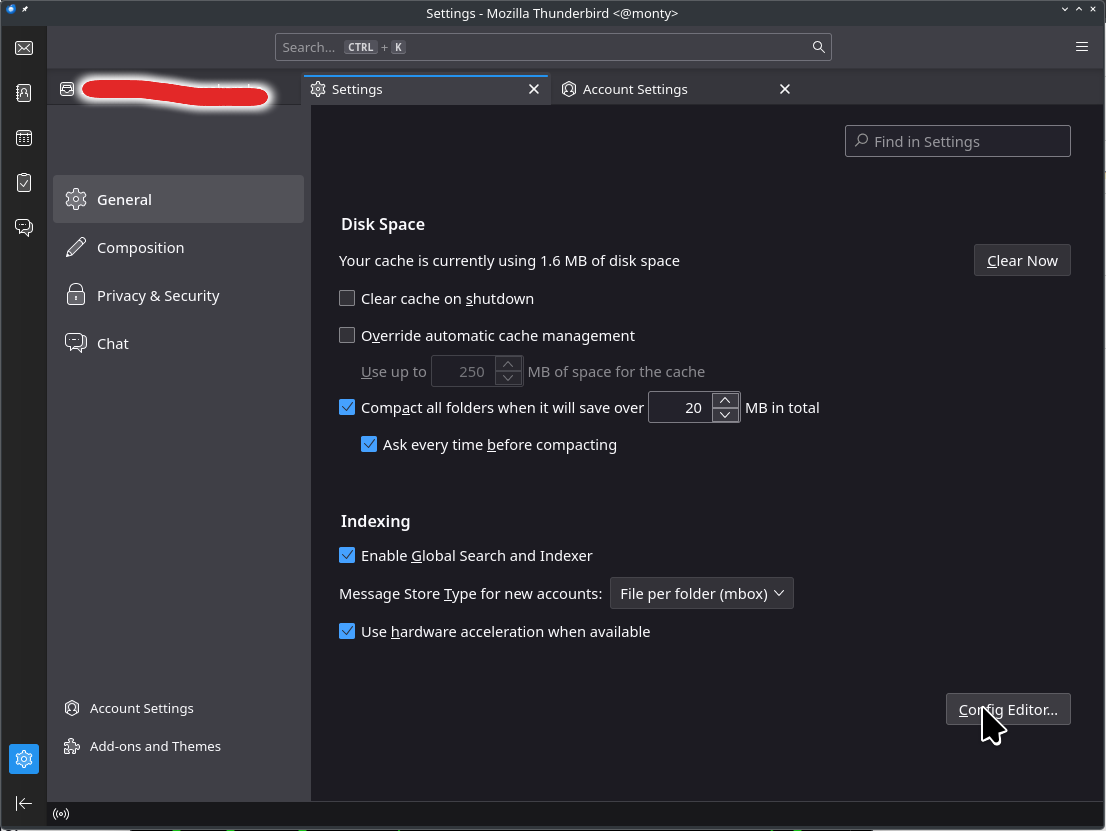
Open the global settings, click on the "Hamburger" icon and select settings.
Or press [F10] to bring-up the "Menu bar" in Thunderbird and select [Edit] and Settings.
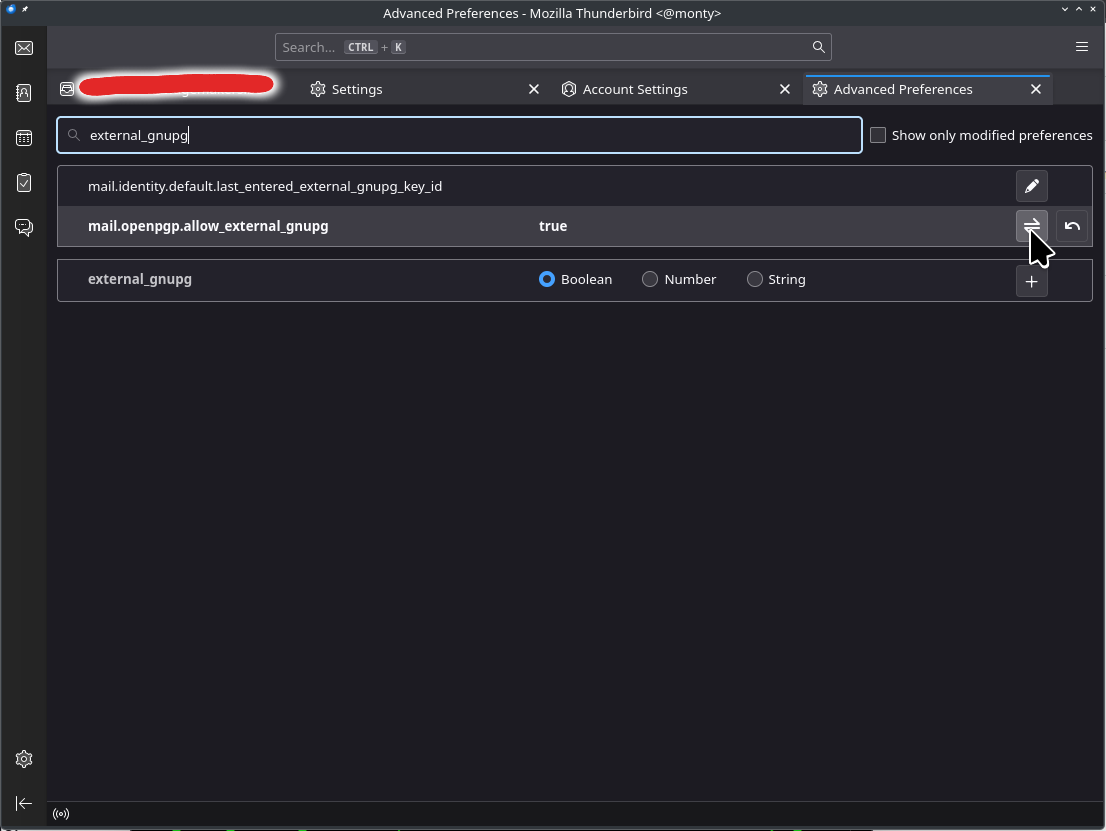
In the Advanced Preferences window search for "external_gnupg" settings and set mail.indenity.allow_external_gnupg to true.
Setup End-To-End Encryption
The next step is to configure the GPG keypair that we’ll use for our user account.
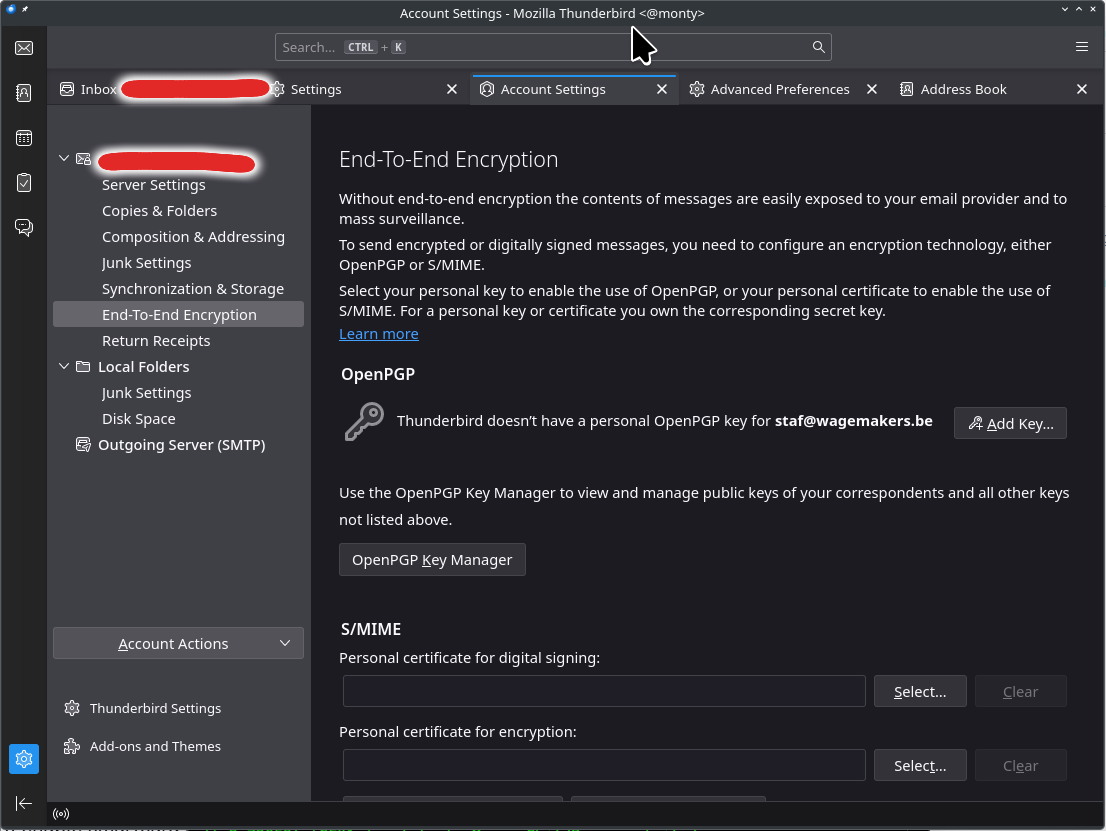
Open the account setting by pressing on the "Hamburger" icon and select Account Settings or press [F10] to open the menu bar and select Edit, Account Settings.
Select End-to-End Encryption at OpenPG section select [ Add Key ].
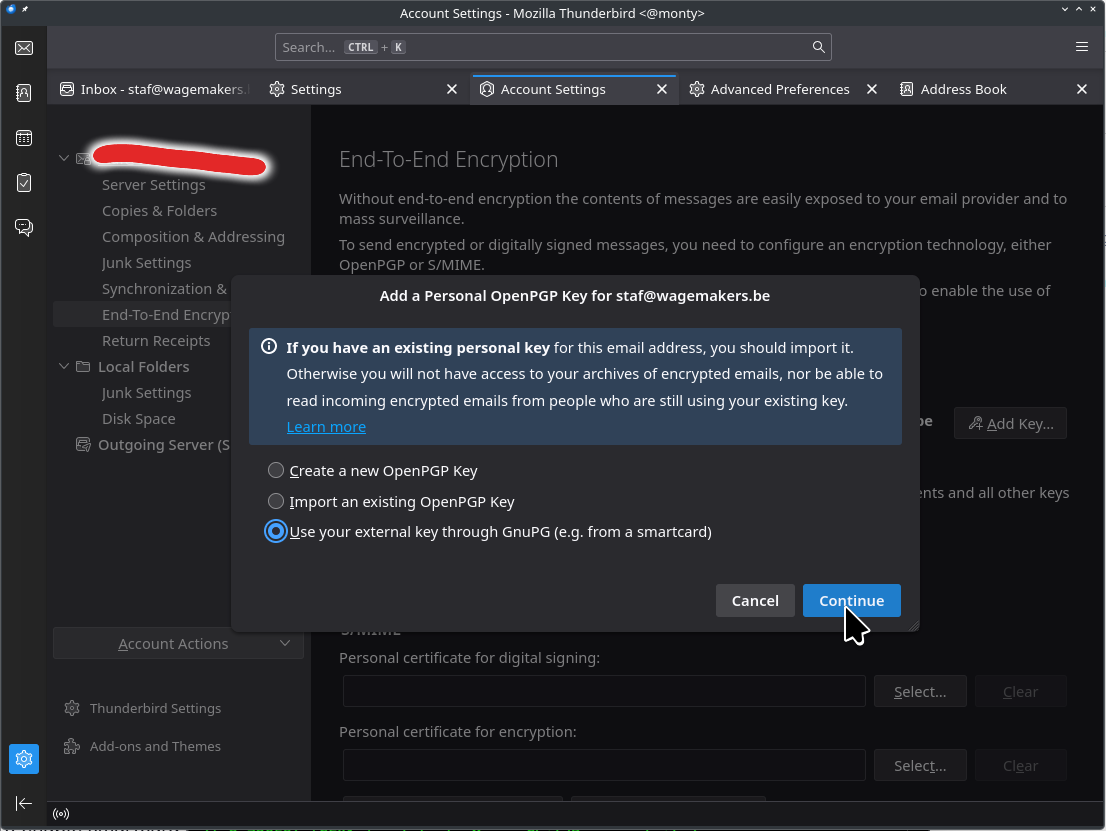
Select the ( * ) Use your external key though GnuPG (e.g. from a smartcard)
And click on [Continue]
The next window will ask you for the Secret Key ID.
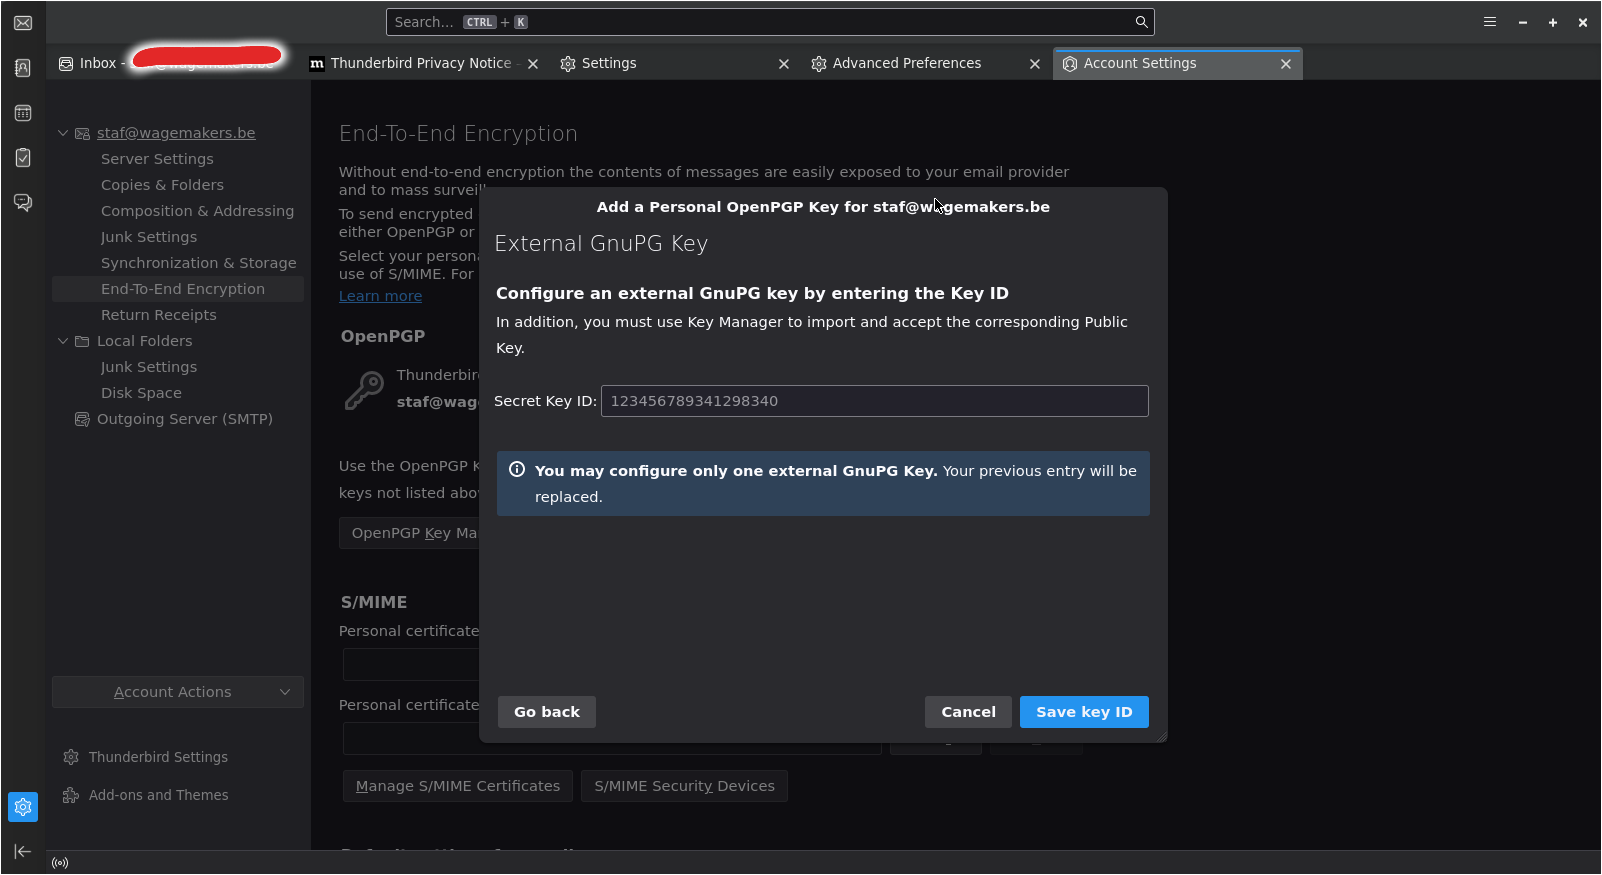
Execute gpg --list-keys to get your secret key id.
Copy/paste your key id and click on [ Save key ID ].
I found that it is sometimes required to restart Thunderbird to reload the configuration when a new key id is added. So restart Thunderbird or restart it fails to find your key id in the keyring.
Test
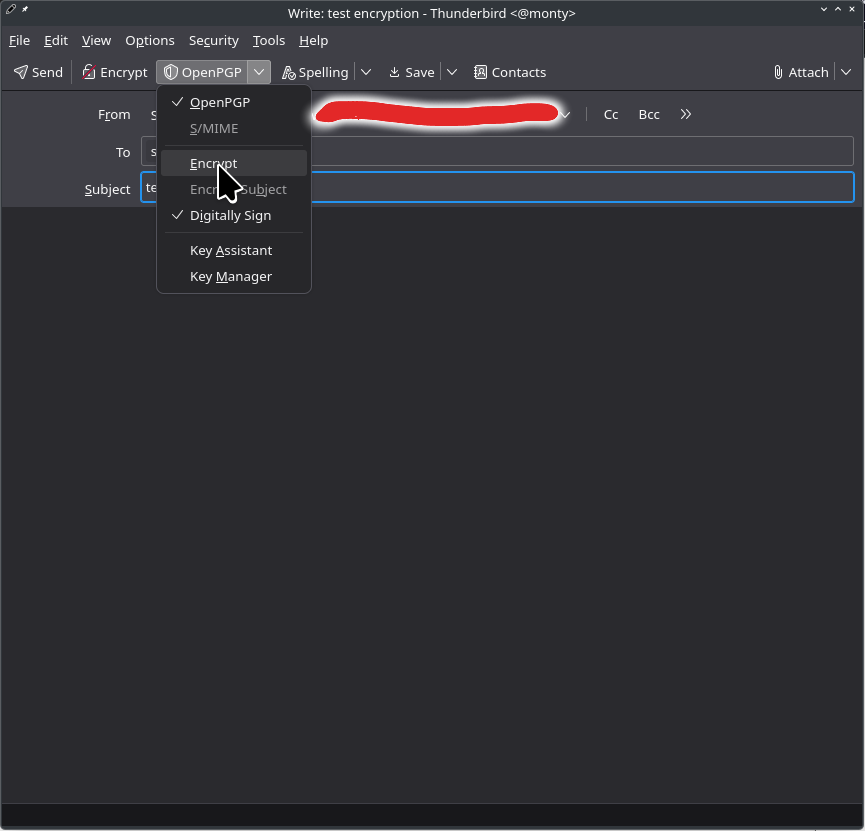
As a test we send an email to our own email address.
Open a new message window and enter your email address into the To: field.
Click on [OpenPGP] and Encrypt.
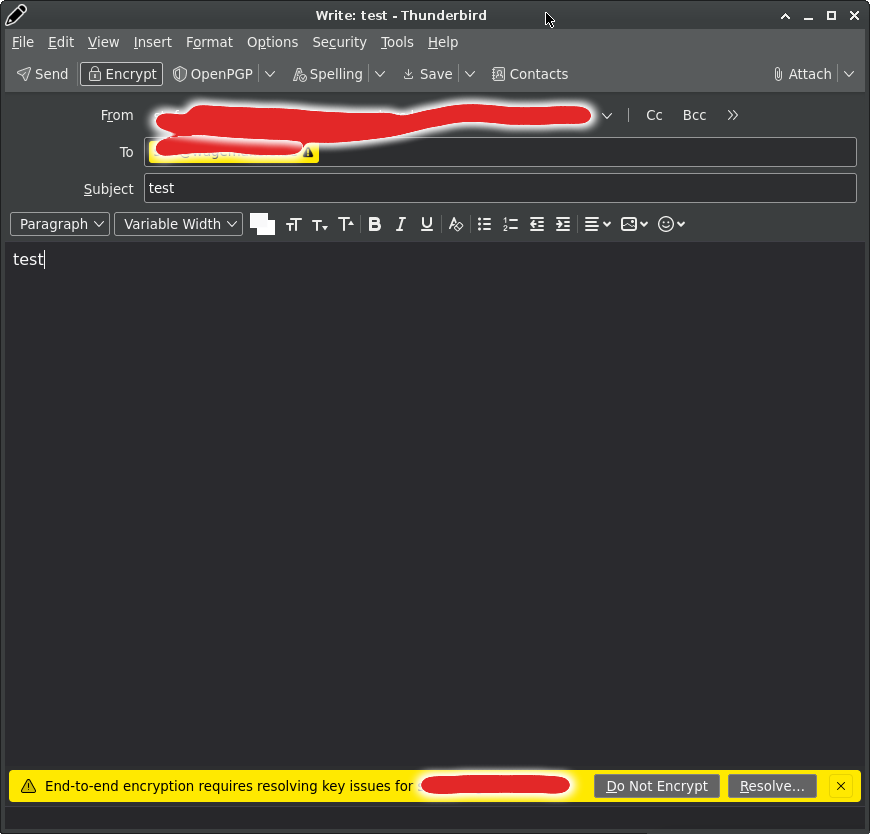
Thunderbird will show a warning message that it doesn't know the public key to set up the encryption.
Click on [Resolve].
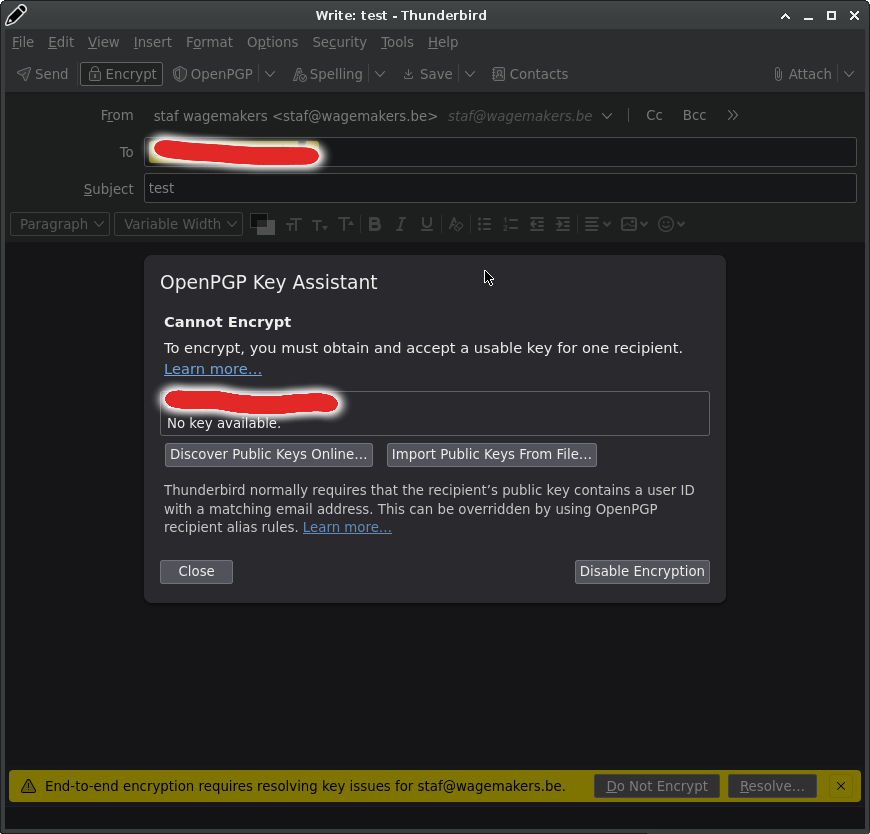 In the next window Thunderbird will ask to Discover Public Keys online or to import the Public Keys From File, we'll import our public key from a file.
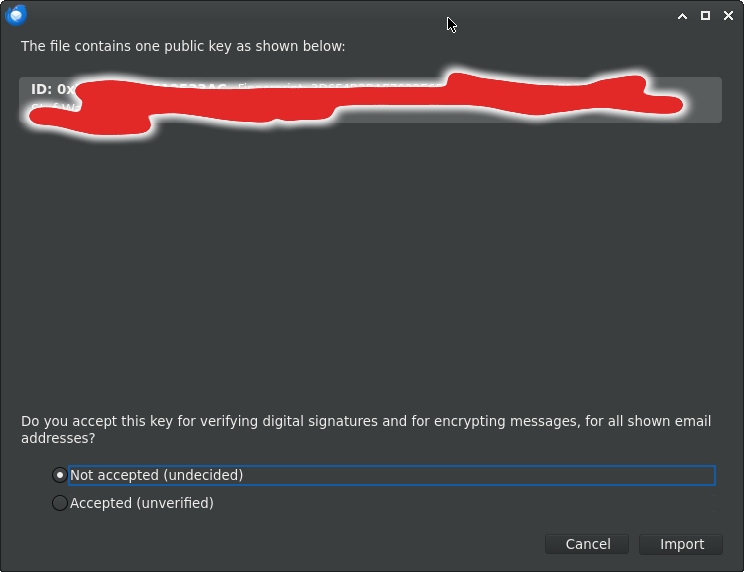
Thunderbird will show a window with the key fingerprint. Select ( * ) Accepted.
Click on [ Import ] to import the public key.

With our public key imported, the warning about the End-to-end encryption requires resolving key issue should be resolved.
Click on the [ Send ] button to send the email.
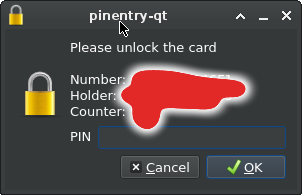
To encrypt the message, Thunderbird will start a gpg session that invokes the pinentry command type in your pincode. gpg will encrypt the message file and if everything works fine the email is sent.
Have fun!
Links
- https://wiki.mozilla.org/Thunderbird:OpenPGP
- https://wiki.mozilla.org/Thunderbird:OpenPGP:Smartcards
- https://support.mozilla.org/en-US/kb/openpgp-thunderbird-howto-and-faq
- https://addons.thunderbird.net/nl/thunderbird/addon/enigmail/
- https://wiki.debian.org/Smartcards/OpenPGP
- https://www.floss-shop.de/en/security-privacy/smartcards/13/openpgp-smart-card-v3.4?c=11
- https://www.gnupg.org/howtos/card-howto/en/smartcard-howto-single.html
- https://support.nitrokey.com/t/nk3-mini-gpg-selecting-card-failed-no-such-device-gpg-card-setup/5057/7
- https://security.stackexchange.com/questions/233916/gnupg-connecting-to-specific-card-reader-when-multiple-reader-available#233918
- https://www.fsij.org/doc-gnuk/stop-scdaemon.html
- https://wiki.debian.org/Smartcards
- https://github.com/OpenSC/OpenSC/wiki/Overview/c70c57c1811f54fe3b3989d01708b45b86fafe11
- https://superuser.com/questions/1693289/gpg-warning-not-using-as-default-key-no-secret-key
- https://stackoverflow.com/questions/46689885/how-to-get-public-key-from-an-openpgp-smart-card-without-using-key-servers






Leave a comment